How to Configure Outlook to use Ashley Cyber eMail Servers
If at any time you have trouble and would like assistance, please feel free to contact the Ashley Cyber Computer and Network Support Department at (703) 297-8227.
I. Ashley Cyber Mail Server Settings:
User Information
- Your Name: This displays in the “from” field when you send an email.
- Email Address: username@domain.xxx
Login Information
- Login Name: Same as email address, username@domain.xxx
- Password: Provided by your Administrator or the password you just set in WebMail
Server Information
- Incoming Mail Server: sm01.mail.ashleycyber.com
- Outgoing Mail Server: sm01.mail.ashleycyber.com
II. Configuring Outlook to use Ashley Cyber Mail Servers:
- Open Microsoft Outlook 2007
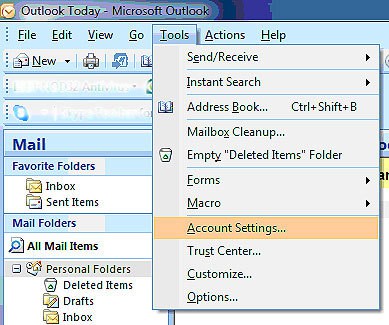
- Open the Account Settings window by clicking on Tools and selecting “Account Settings…”
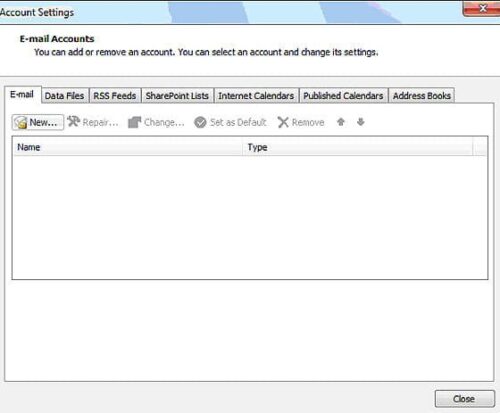
- Under the E-mail tab click the button labeled “New” to open the Add New E-mail Account wizard.
- Make sure that “Microsoft Exchange, POP3, IMAP, or HTTP” is selected.
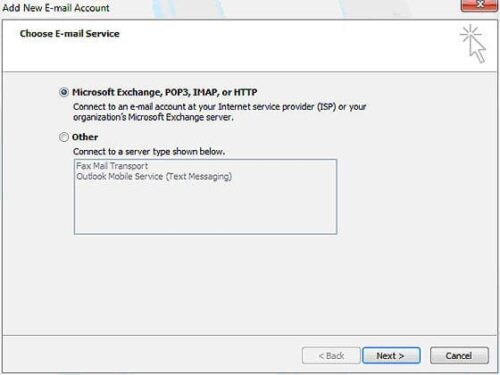
- Click Next to continue.
- Check the box that says “Manually configure server settings or additional server types”.
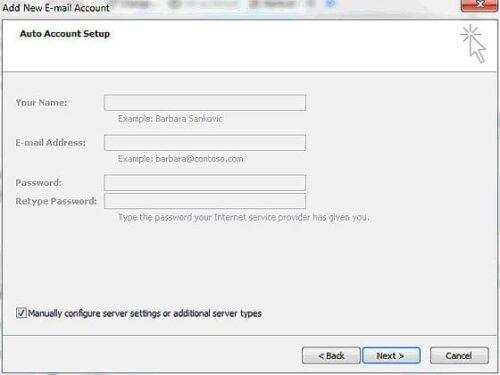
- Click Next to continue.
- Make sure that “Internet E-mail” is selected
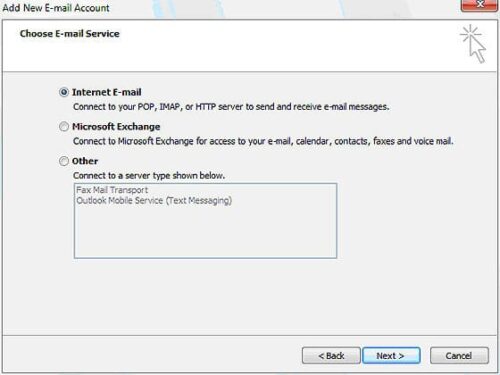
- Click Next to continue.
- Please enter the following information:
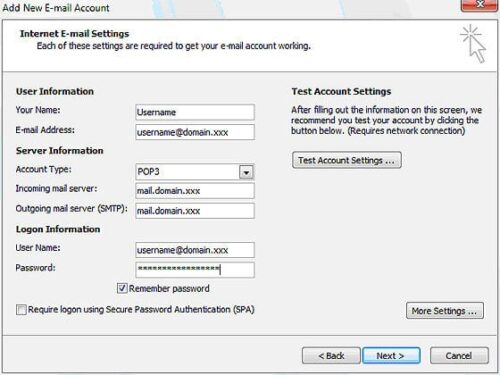
User Information- Your Name: Please input your name as you want it to be displayed on sent mail.
- Email Address: username@domain.xxx
Logon Information
- User Name: Same as your email address, please verify that your username includes@domain.xxx
- Password: Please input your new password provided by your Administrator. Make sure the “Remember Password” box is selected.
Server Information
- Incoming Mail Server: mail.domain.xxx
- Outgoing Mail Server: mail.domain.xxx
- Click More Settings to continue.
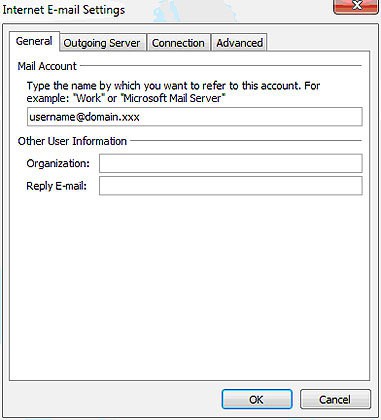
- Change the default name from mail.domain.xxx to something easier to read, such as “Work Email,” or “UserName @ Domain.” This may make the account easier to find should you need to make changes later.
- Select the “Outgoing Server” tab to continue.
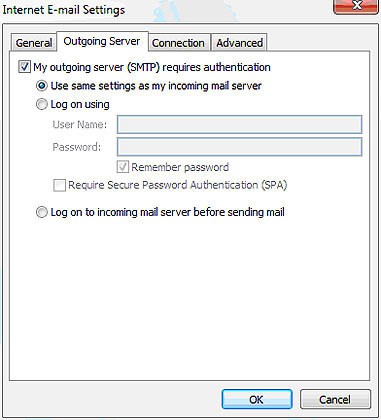
- Verify that the “My outgoing server (SMTP) requires authentication” box is selected and that the “Use same settings as my incoming mail server” button is selected.
- Click OK to continue.
- Click Next to continue.
- Click Close to close the “Account Settings” dialog window.


